A Designer's Guide to Grumpicon
April 2020 note: Hi! Just a quick note to say that this post is pretty old, and might contain outdated advice or links. We're keeping it online, but recommend that you check newer posts to see if there's a better approach.
The number of devices with high resolution screens is rising, and with it the need for a simple way to deliver crisp, resolution-independent graphics that don’t waste bandwidth. Vector-based graphics, which are compact and scalable, are a great solution.
Icon fonts deliver vector illustrations in an easy format, and there are huge variety of pre-made icon sets to choose from. So, problem solved? Not exactly. They don’t work on a number of important mobile platforms like Opera Mini (used by 200+ million users worldwide!) and Windows Phone 7.0-7.8 (with 4 million users).
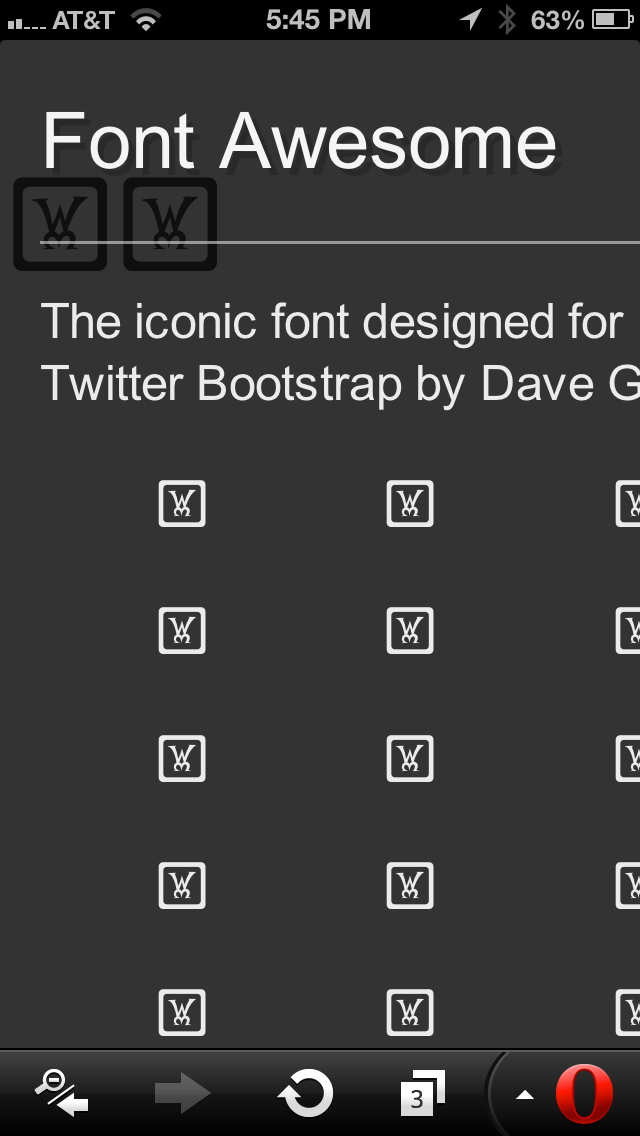
And by “don’t work” we mean that these browsers display unreadable unicode characters, as you can see in this screenshot showing IcoMoon icon fonts on Opera Mini.
Scalable Vector Graphics (SVGs), on the other hand, offer all the advantages of icon-based vectors, and also have the added benefit of supporting multiple colors, gradients, opacity and all kinds of other visual goodness that icon fonts can’t match. SVGs present some compatability challenges themselves—they’re not supported on key platforms including IE ≤ 8.0 or Android 2.x—but SVG feature detection is very reliable so we suspected there might be ways to make it work.
To start we built a command line utility, which we called Grunticon because it uses Ben Alman’s Grunt.js build tool and it delivers icons (clever, huh?). Grunticon uses a set of SVG files to generate CSS for applying icons as SVG background images along with fallback PNG images/CSS for less capable browsers. This approach lets us deliver vectors to all the devices that can handle them, and also automatically provide a reliable fallback for cases where vectors don’t work.
Grunticon was great for people comfortable with the command line, but we quickly heard that the setup was daunting to many designers creating production assets on many projects. We went back to the drawing board to see if we could simplify it to make it more usable for a wider audience, and we think we’ve got it.
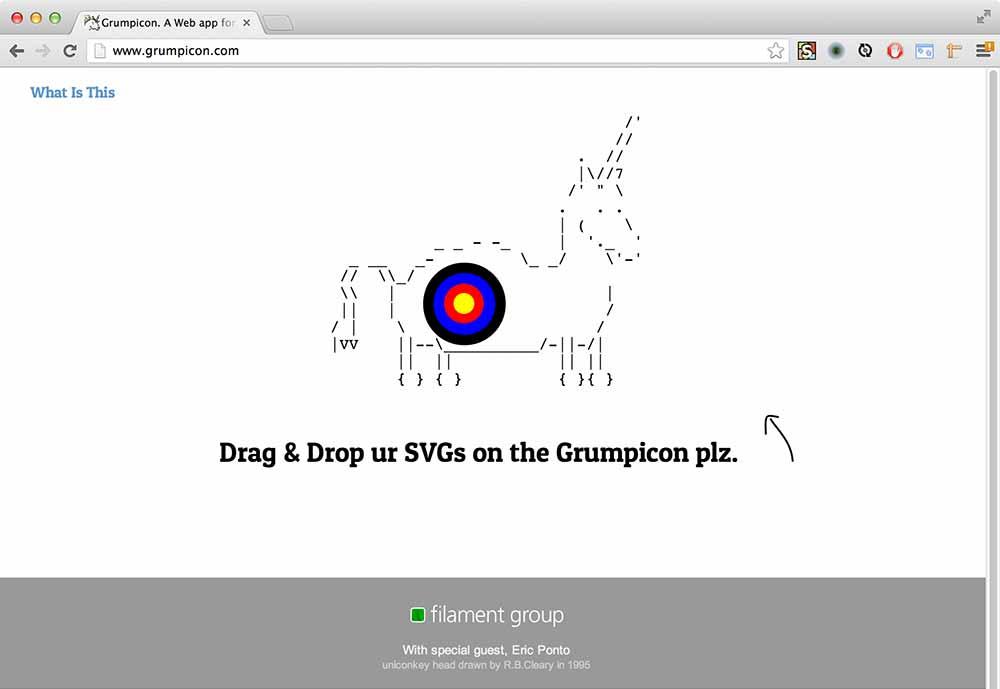
Grumpicon puts all the power of Grunticon on the web: you simply drag and drop SVG files into a browser window, then Grumpicon does its magic and generates a downloadable zip with all the files you need. It can be used to process icon font libraries, or custom icon sets using your own hand-drawn files.
We’re going to walk you through everything you need to know to make the switch to vector with Grumpicon:
- determining which images work in SVG format,
- preparing a set of SVG images,
- processing SVGs with Grumpicon, and
- using the images in your project.
Which images make good SVGs?
Most icons, logos, and illustrations are great candidates for SVG format, including single- and multi-color icons, and logos, illustrations and other graphics that use grouped objects, gradients, opacity variations, and the rounded corner effect. Text is OK, too, as long as you convert it to outlines to avoid embedding the font.
We recommend being cautious about using more complex effects—like drop shadows, inner and outer glow, extrude, and warp— when creating SVGs in apps like Adobe Illustrator, because the effects are often rasterized as embedded bitmaps during export, which looks terrible and dramatically increases file size. If you need a custom shadow, try using a low opacity copy of the icon shape and offset it from the original. For images that require the other effects listed above, a bitmap is generally a better choice.
There are also cases where a vector illustration can be so complex that it results in a very heavy SVG file. For example, the Mexican flag SVG shown below has a ton of fine detail that results in a 127kb SVG:
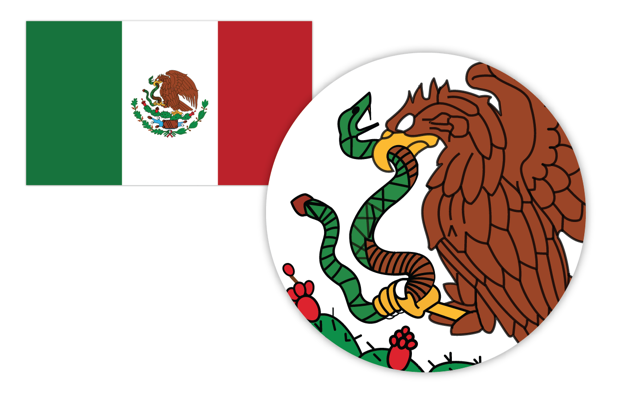
For a large-scale illustration, that detail may be just the right choice as SVG. But this level of fidelity and complexity would be unnecessary for a small 32px icon. It’s more responsible to convert this to a 2x-sized (HD) PNG that weighs in at a few kb.
Creating a set of SVG images
Using pre-made icons from an icon font library
IcoMoon, in addition to providing icon fonts, has a fantastic web-based tool that lets you pick a set of icons from all the leading icon font libraries, then download a custom font pack of SVGs.
To use IcoMoon with Grunticon: pick your icons, then click the “Images” button at the bottom of the screen instead of “Font”. In the dialog, set the color and pixel size for your icons and uncheck the “include PNG” and “CSS Sprite” options.
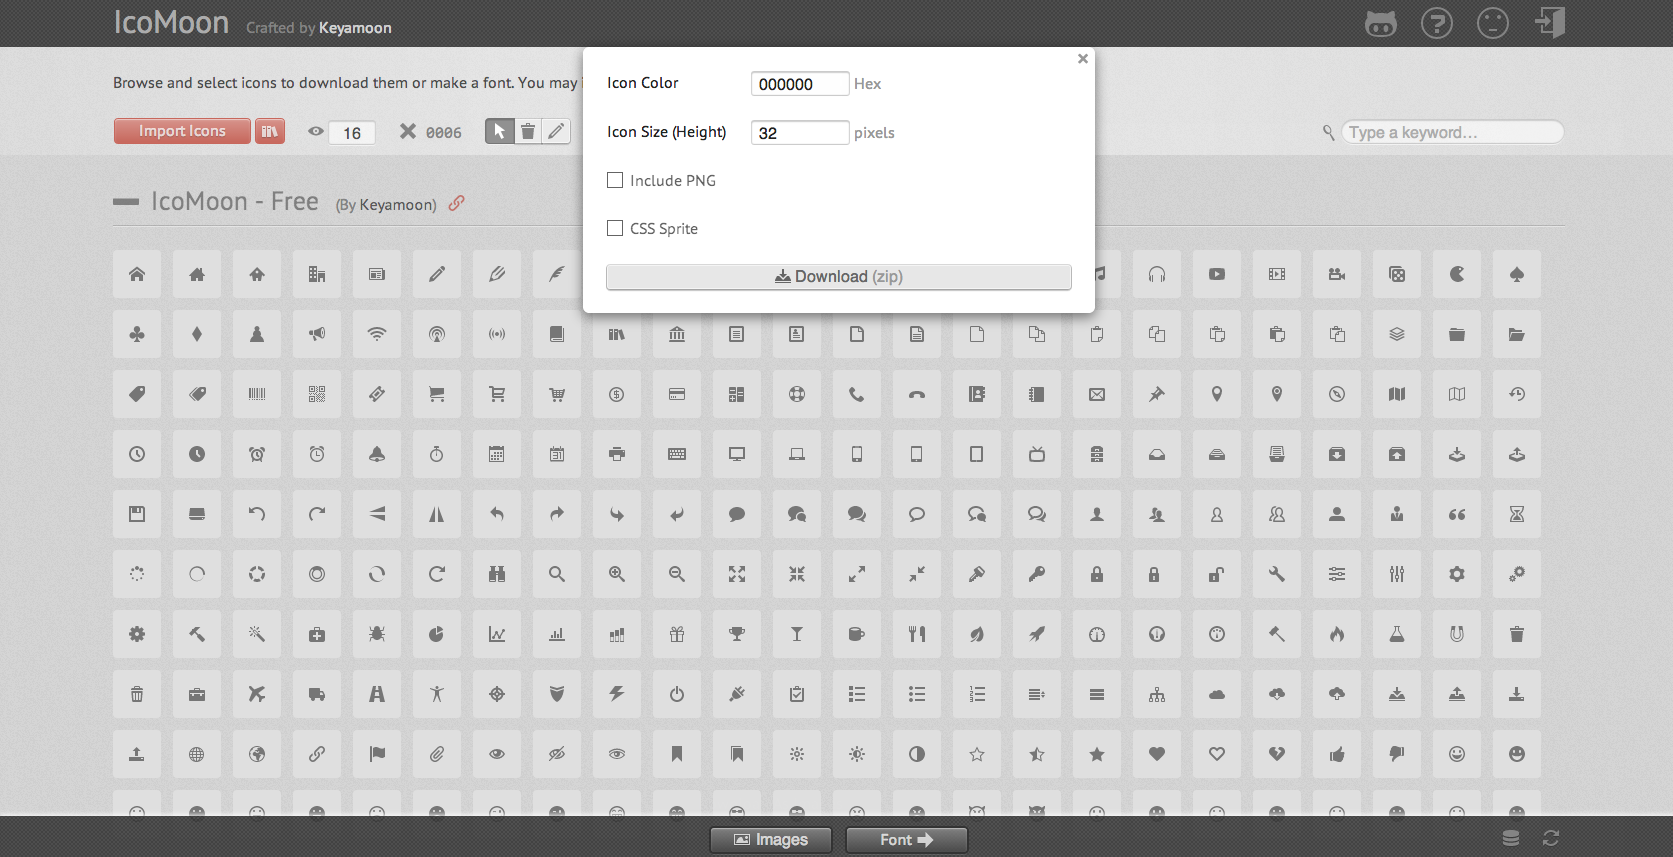
Download and open the zip. It contains individual SVG files for each icon, exactly what Grumpicon needs to do its job.
Important note: To use different colors or sizes of the same icon, you’ll need to export a set of SVGs for each variation in order for Grumpicon to create matching fallback PNG images. Repetitive, we know, but necessary for universal compatibility.
Using custom SVGs for logos, multi-color icons, illustrations & graphics
In addition to simple single-color icons, SVGs work really well for images that are typically delivered as bitmaps, like logos, infographics, multi-color icons, and complex illustrations. All of these file types can be generated by Grunticon/Grumpicon.
You’ll need a vector drawing tool that exports SVG files (we use Adobe Illustrator here at Filament Group). There are some important key steps you need to pay attention to when exporting files as SVG, so we’ll go through the process step-by-step.
First, design your icons or illustrations as you normally would in your drawing tool. If you’re using Adobe CS5 or earlier versions, you need to create a separate file for each SVG.
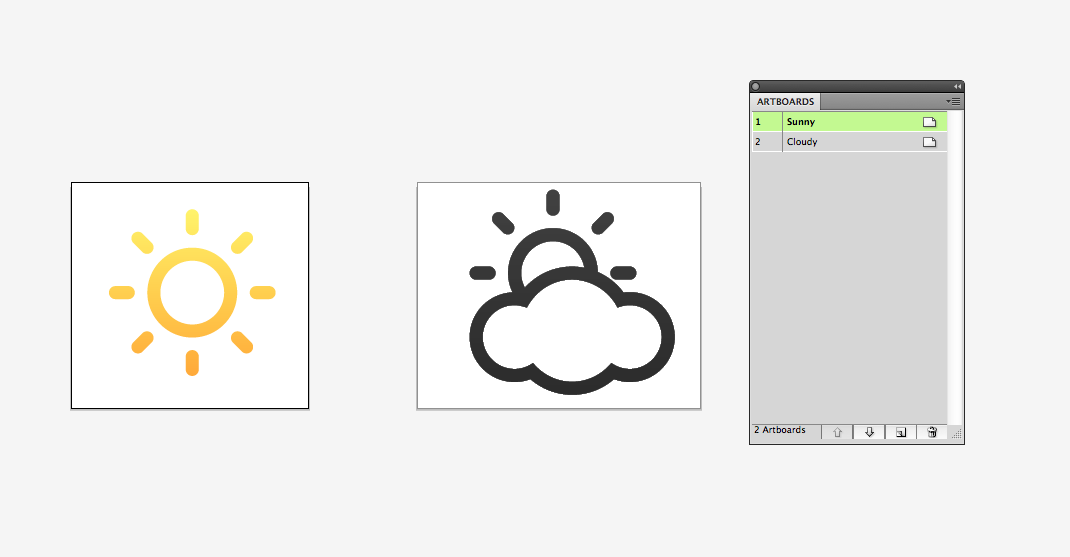
In CS6, you can have multiple icons and illustrations in a single AI file, each on a separate artboard (we find this helpful for cross referencing designs and managing proportions), which you can batch export.
Important: Regardless of your software program, be sure to give your SVG files a meaningful and unique name, because it will be used by Grumpicon to generate class names in the CSS.
To export the SVG files in Illustrator, go to “File > Save a Copy…” and be sure to choose “SVG” as the format.
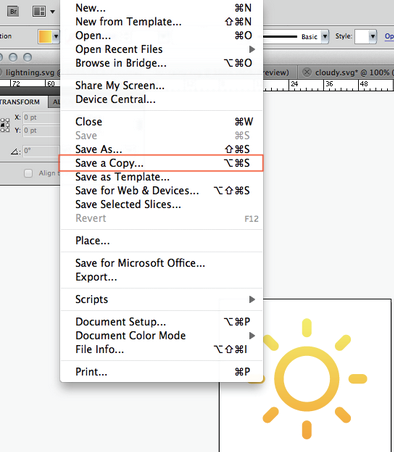
If exporting multiple icons in CS6, click the “use artboards” option and select the range of artboards. Be sure to enter a name in the “Save As” field on top—this will be used as the prefix to each of your artboard names in the final SVG file names.
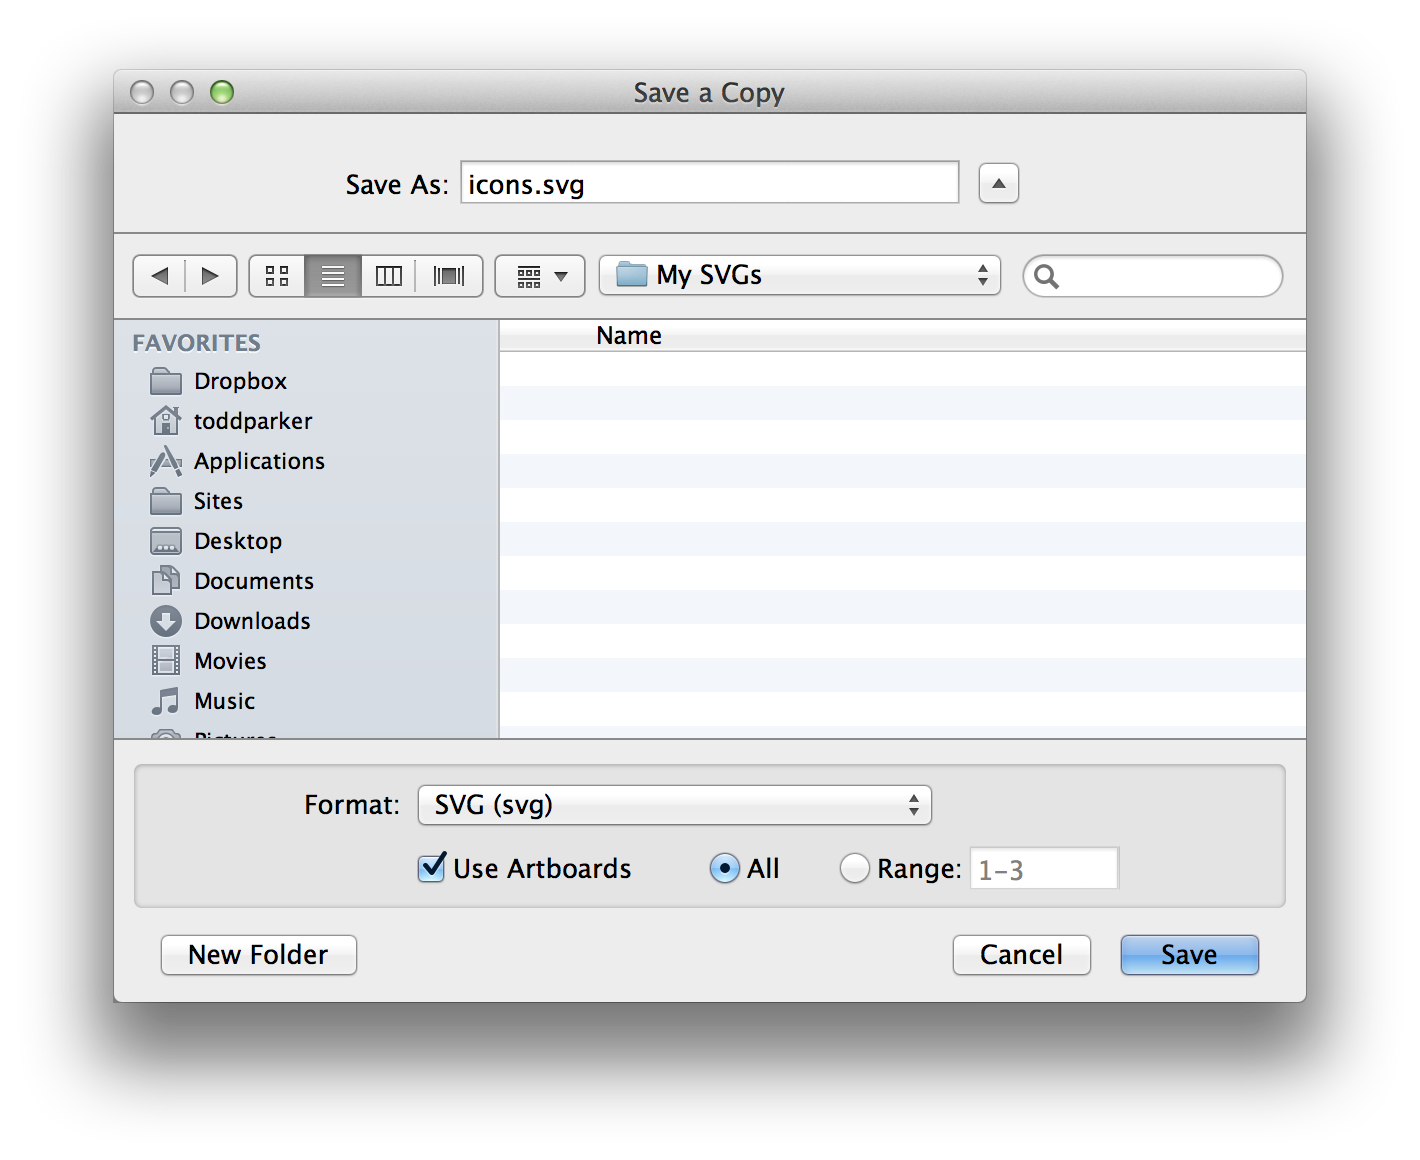
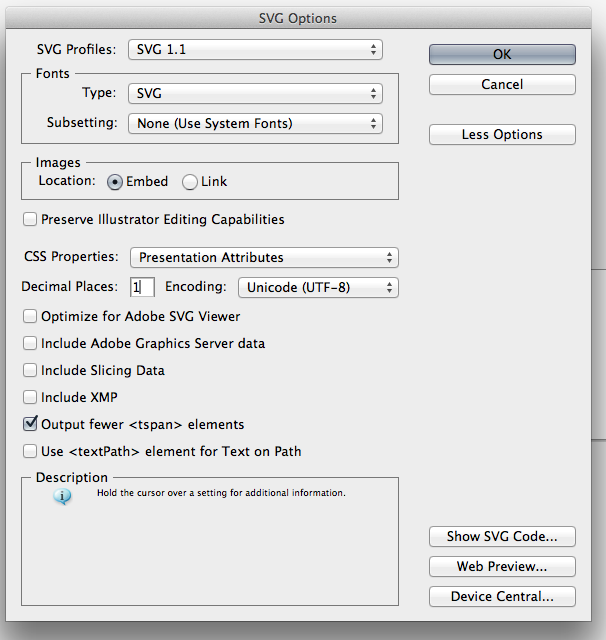
When you hit “Save” the dreaded Illustrator SVG Options dialog will open. It’s full of cryptic settings we barely understand so we’re happy to share what we’ve figured out from trial and error.
- SVG Profiles: SVG 1.1 - This is a well-supported version of SVG. Older versions don’t support things like transparency so we stick to 1.1
- Type: SVG
- Subsetting: None (Use System Fonts)
- Images: Embed - This will embed any bitmaps into the SVG instead of linking to them externally
- Uncheck ‘Preserve Illustrator Editing Capabilities’ - This feature adds information to the SVG file we don’t really need when serving it on a site or app.
- Decimal places: 1 - This rounds the accuracy of each point and defaults to 3. We haven’t seen any loss of quality when using ‘1’ and it should save bits, so we choose ‘1’ instead.
Be sure to click the “More Options” button and uncheck all the options to embed extra metadata cruft for editing. We check the ‘Output fewer <tspan> elements’ option because that sounds like it might be a good thing.
Generating files: Enter the Grumpicon!
Combine all your SVG files into a folder on your computer. You’re now ready to unleash the magical powers of Grumpicon.
Go to Grumpicon.com, and wait for the grumpy corgicon to prance across the screen. When he gets to the middle, he blinks a couple of times.
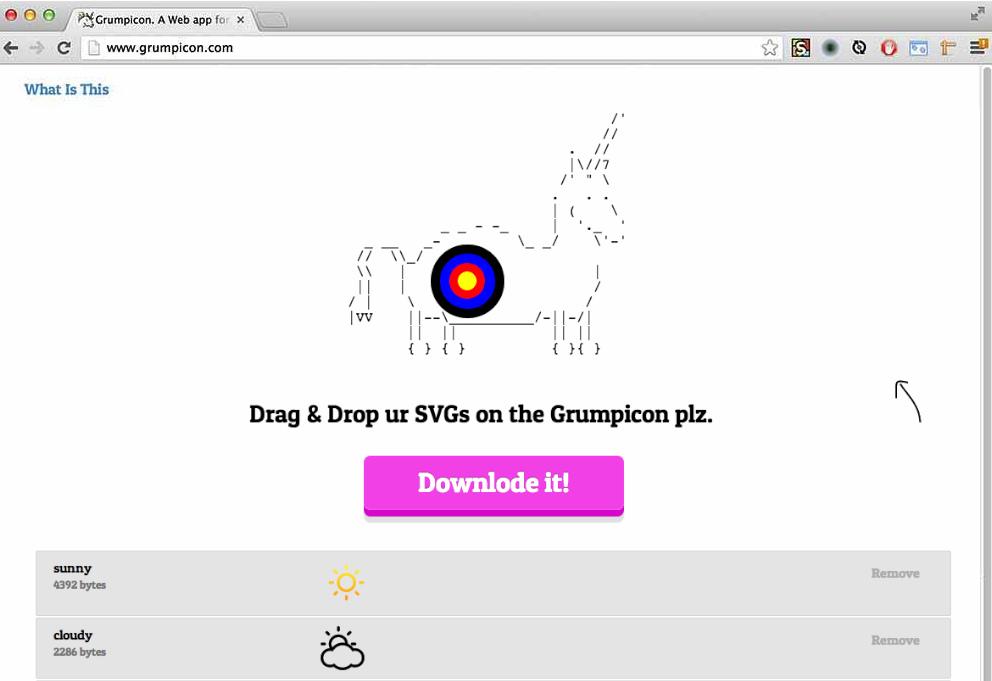
Drag and drop your SVG files into the Grumpicon browser window. If you have a lot of files, you might want to drop them in small groups to keep your browser from burning to the ground.
After dropping your SVGs on the Grumpicon, the app will display a list of the image files that it’s processed. If everything looks right, click the “Downlode it!” button, and Grumpicon will automagically generate a complete packaged set of everything you need—processed SVGs, fallback PNG images, CSS files, and loader—and deliver it as a ZIP file. (Actually, what it really does is take your files and run them through the same Grunticon process on our server that you would on your own machine if you had the Grunticon command line tool installed. But it feels like automagic.)
After downloading the ZIP, the directory will look something like this:
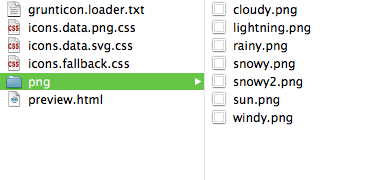
The preview.html file displays a list of all the images in a handy class name reference. There are three CSS files: SVG and PNG stylesheets with the image data encoded as background images, and a super fallback stylesheet that references external PNG files in the /png/ folder for old IE. The grunticon.loader.txt file is an example of the script you will need to add to each page to load the right stylesheet file. More on that next.
Using your Grumpicon'd/Grunticon'd Resources
Open preview.html to see all the images/icons and a working example of how to embed and reference the icons in your page. Moving the assets into your project is easy.
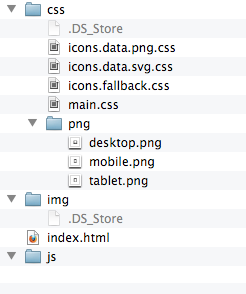
1. Move the Grunticon files to your CSS folder
Copy the stylesheets and PNG fallback folder to your CSS folder. Adding the Grunticon’d files to your directory might look something like this:
2. Add the loader to the `` of all your pages
Grunticon uses a special loader script that figures out whether a browser supports SVG and automatically falls back to using a PNG version if not. We use a JavaScript loader to ensure that only a single stylesheet is loaded. (If we linked to all three, they would all be downloaded, a terrible waste of bandwidth.)
Open preview.html for an example of how to add the loader to your page. Below the <script> tag is a <noscript> tag with a link to the fallback stylesheet so non-JS browsers will still see icons.
<!doctype HTML>
<html lang="en">
<head>
<title>Icons Preview!</title>
	<script>
	/* grunticon Stylesheet Loader | https://github.com/filamentgroup/grunticon | (c) 2012 Scott Jehl, Filament Group, Inc. | MIT license. */
	window.grunticon=function(e){if(e&&3===e.length){var t=window,n=!!t.document.createElementNS&&!!t.document.createElementNS("http://www.w3.org/2000/svg","svg").createSVGRect&&!!document.implementation.hasFeature("http://www.w3.org/TR/SVG11/feature#Image","1.1"),A=function(A){var o=t.document.createElement("link"),r=t.document.getElementsByTagName("script")[0];o.rel="stylesheet",o.href=e[A&&n?0:A?1:2],r.parentNode.insertBefore(o,r)},o=new t.Image;o.onerror=function(){A(!1)},o.onload=function(){A(1===o.width&&1===o.height)},o.src="data:image/gif;base64,R0lGODlhAQABAIAAAAAAAP///ywAAAAAAQABAAACAUwAOw=="}};
	grunticon( [ "icons.data.svg.css", "icons.data.png.css", "icons.fallback.css" ] );
	</script>
	<noscript><link href="icons.fallback.css" rel="stylesheet"></noscript>
</head>
Important: Make sure the paths in the both the <script> and <noscript> tags are pointing to the right directory paths. In the example above, since we moved the grunticon files into the CSS folder, each link needs to have css/ added to make the paths work:
grunticon( [ "css/icons.data.svg.css", "css/icons.data.png.css", "css/icons.fallback.css" ] );
</script>
<noscript><link href="css/icons.fallback.css" rel="stylesheet"></noscript>
3. Apply Grunticon classes
To add Grunticon-generated images to element backgrounds, simply copy and paste the class of the file you want from preview.html into the desired markup.
The classes generated by Grunticon set only the background-image and background-repeat properties to avoid interfering with your other styles:
.icon-favorite {
	background-image: url('data:image/svg+xml;...');
	background-repeat: no-repeat;
}
(The preview page notes the height and width for each icon set as an inline style; intended only as a handy reference.)
To apply additional styles to the same markup, we recommend appending classes to the element or writing styles in a separate stylesheet. By maintaining style exceptions elsewhere, you can easily update and overwrite your Grumpicon-generated files.
For example, if you have groups of icons that share a specific size or background position, you can create and assign an icon class to apply those styles:
.icon {
	height: 32px;
	width: 32px;
	background-position: 50% 50%;
}
In your markup, add the class to set the icon dimensions and a second to set the icon background, like this:
<div class="icon icon-favorite”></div>
You can see a demonstration page here.
4. Use Grunticon SVGs as foreground images with PNG fallbacks
If an image must appear in the foreground, there are a few techniques for referencing SVGs directly in the markup with fallbacks.
Thoughts?
If you’d like to get involved with the web app, Grumpicon is on github.